
The Data Connector JSON HTTP Push enables receiving content from an external system in a JSON format.
Please note that for incoming payloads, we accept messages up to 5Mb in size.
Requirements
While some APIs are publicly available, there are other ones requiring authentication. Keep in mind:
The App ID or authentication token needs to be added to the URL.
Authentication based on headers IS NOT supported.
Generate Data connector Inputs and configure it as JSON HTTP Push - Content
Generate the Data Connector Input
(1) Unfold the Settings at the top menu and then select Data Connectors - Inputs.

If the "+" button is not visible, it is because only company administrators have the privilege to add data connectors - Inputs. If you require access to this functionality, please reach out to your designated Customer success manager or the support team.
(2) Click on Add and choose JSON HTTP Push - Content.

(3) Edit the new Input.
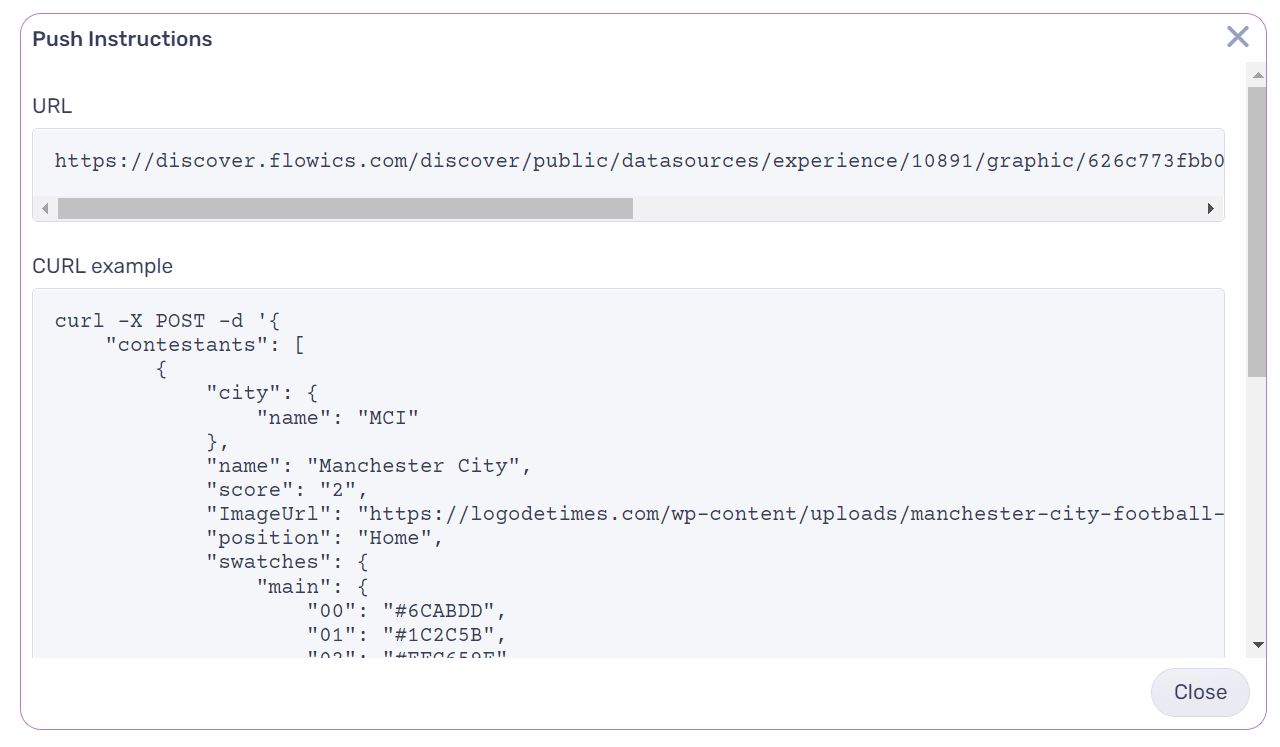
(4) The token is the identifier that is generated for each new Input, Push URL is the instruction with the integrated token.
(5) You can assign the name of your Input. Schema is the section where you can edit the JSON schema.
(6) In case you do not have the Schema.
(7) If you had previously generated the schema.
(8) Control Access- Allowed CORS Origin: This allows data to be pushed from the browser directly to Flowics from other web apps. Can be tested with an OPTIONS request: curl -i -X OPTIONS -Horigin:http://xx -HAccess-Control-Request-Method: POST https://discover.flowics.com/… for more info about the OPTIONS method click here.
(9) Control Access - Allowed IP Networks: Allows to receive only data from certain hosts on the internet. The list can contain individual IP addresses (IPv4/IPV6) 192.168.0.1 or networks 192.168.0.0/24

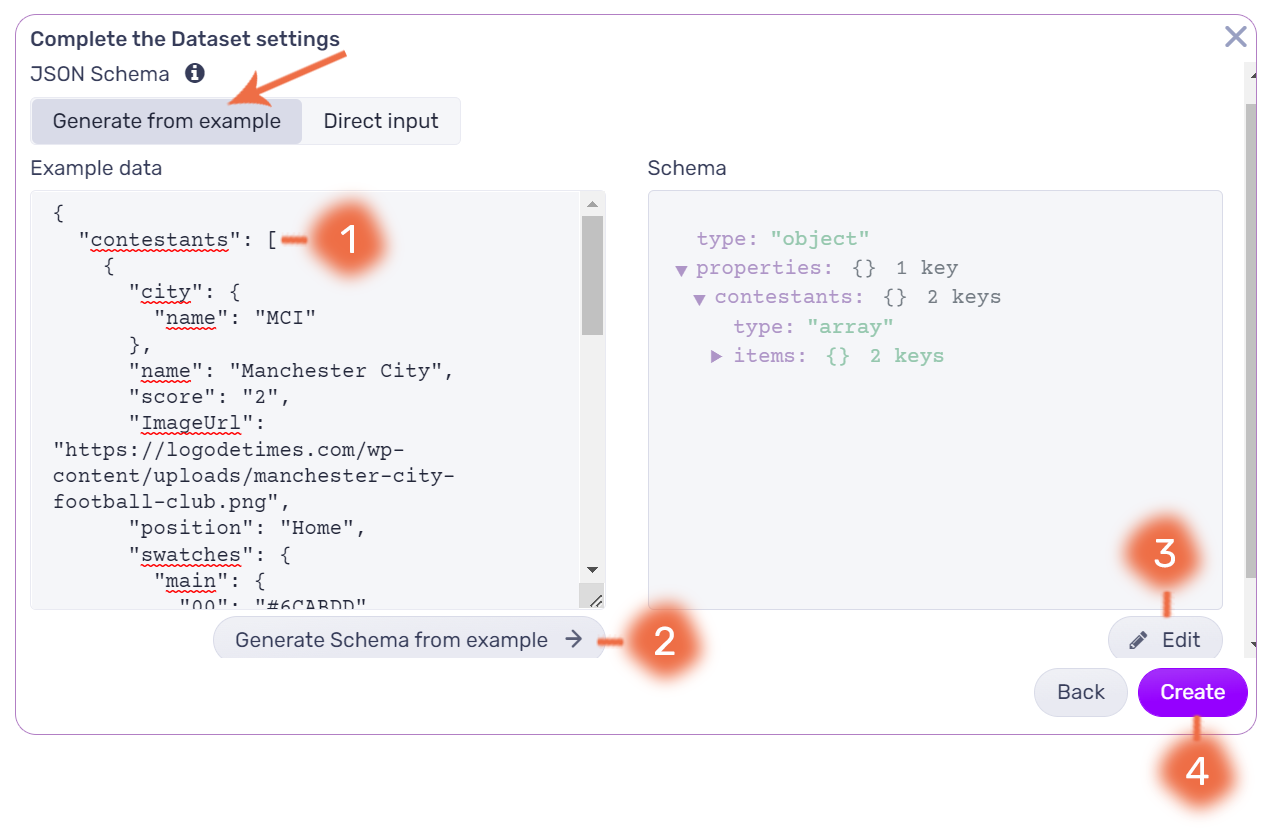
Generate from example
Generate from example
Select this option to automatically generate the JSON schema directly in Viz Flowics.
(1) Enter the JSON.
(2) Click on Generate schema from the example.
(3) Edit it in case one does not match the type. For example, if it is an image it should be of the type "imageURL".
(4) Click on Create.
Adding the Data Connector to the Graphics Editor
First, you need to add a Data Connector to your tree (1) and then click on Connect (2)
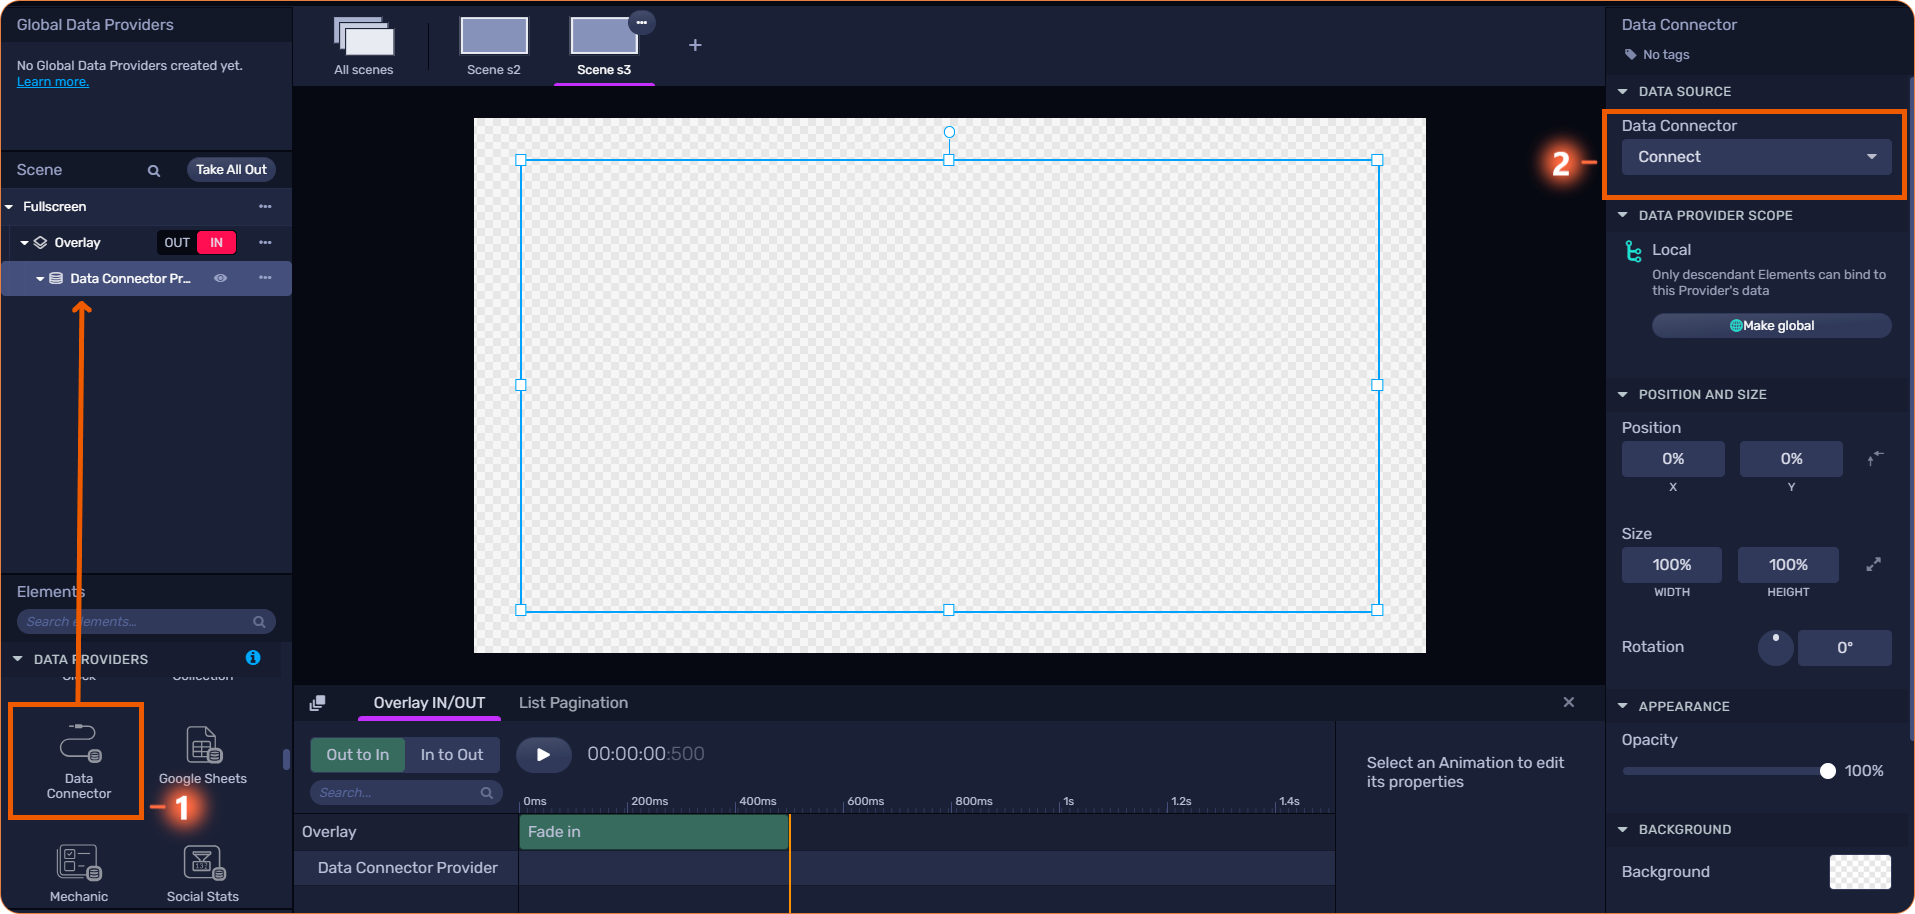
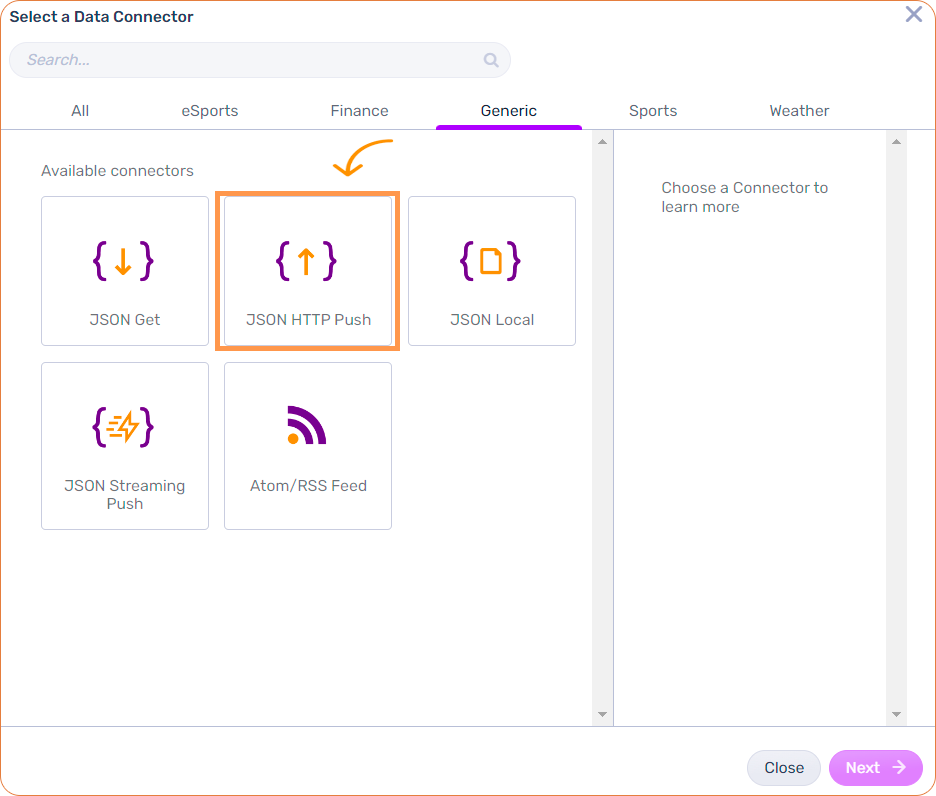
From the Data Connector panel choose JSON HTTP Push (if it is not listed contact your designated Customer Success Manager).
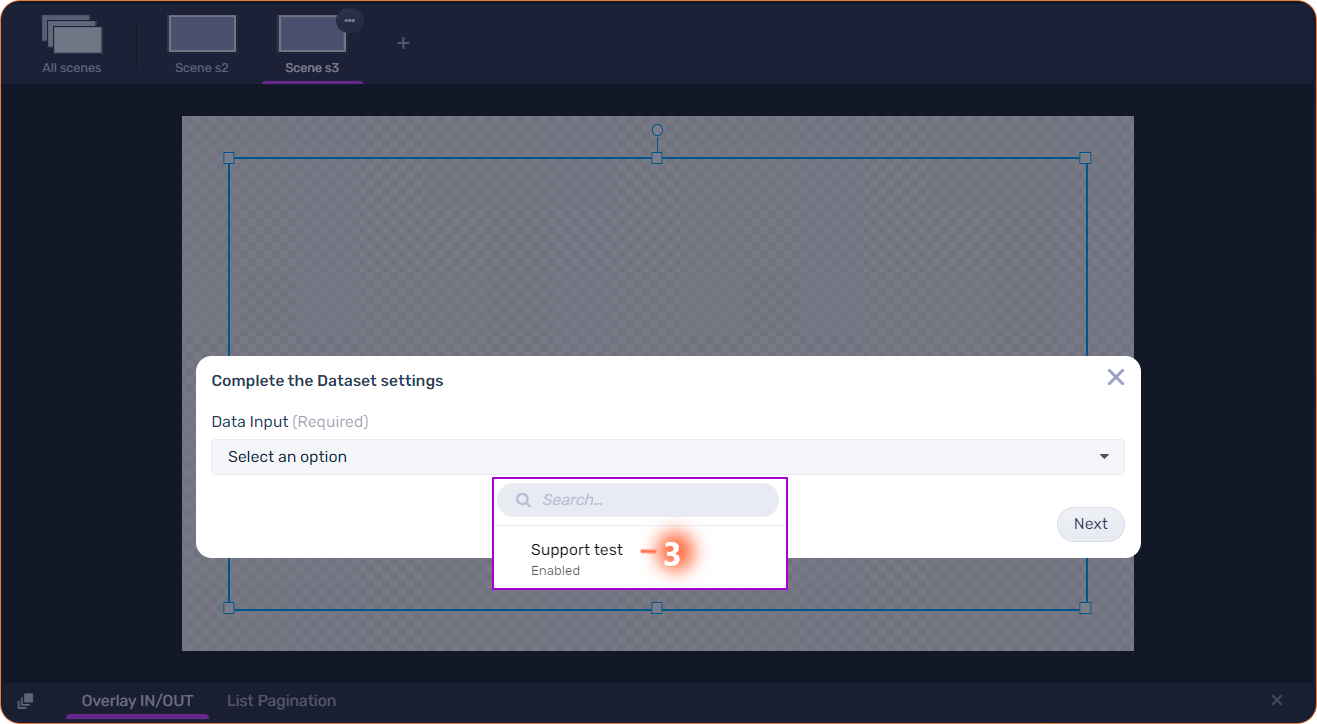
(3) Select the input you added earlier, in the Data Connectors - Inputs section
Now you will get an endpoint URL or the curl where you need to make the POST request. Bear in mind this Data Connector expects a POST request from an external system. The data sent needs to be formatted according to the schema you have defined.
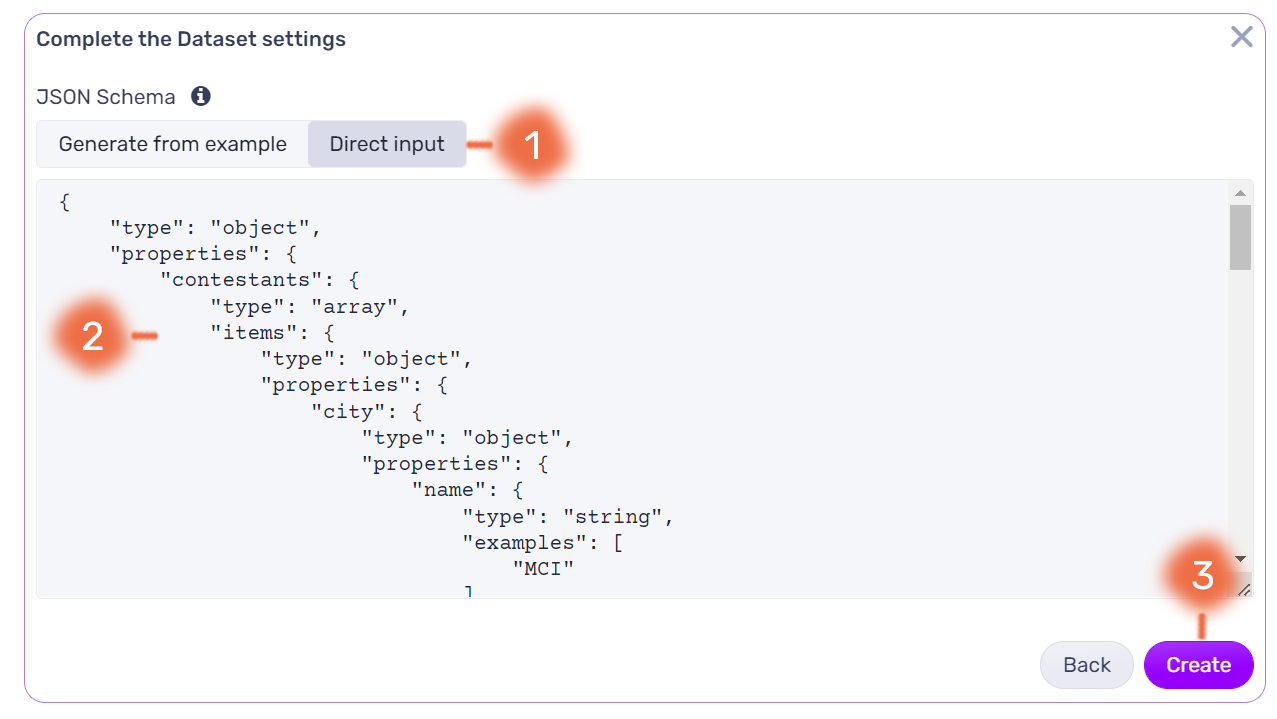
Direct input
Direct input
Select this option if you have generated the JSON schema manually
(1) Go to Direct Input.
(2) Paste the schema.
(3) Click on Create.
Adding the Data Connector to the Graphics Editor
First, you need to add a Data Connector to your tree (1) and then click on Connect (2)
From the Data Connector panel choose JSON HTTP Push (if it is not listed contact your designated Customer Success Manager).
(3) Select the input you added earlier, in the Data Connectors - Inputs section
Now you will get an endpoint URL or the curl where you need to make the POST request. Bear in mind this Data Connector expects a POST request from an external system. The data sent needs to be formatted according to the schema you have defined.