
This Data Provider allows you to display curated and moderated social content that has been added to a collection.
This social content could be:
Posts from Twitter, Facebook, and Instagram.
Comments and replies from Facebook, Instagram, YouTube, and Twitch.
Use this Data Provider to create custom social content graphics layout such as Lower thirds, L-bars, crawlers, Tickers, banners, etc.
If you are looking for a predefined graphic then we recommend using the Comments Widget in any of its available layouts.
Before using a Collection Data Provider you should have created a Collection.
Remember, an Overlay will be created automatically if you didn't add it to Tree after adding the Provider.
To learn how to add elements to the Tree, click here.
Working with a Collection Data Provider

1. Pick a Collection
After adding the Collection Data Provider to the Tree

(1) Select the Collection Provider in the Tree.
(2) Click "Pick a Collection" in the Inspector.
(3) Choose the Collection you want to use from the list.
2. Data Binding
Add a Dynamic Content List as a child of your Collection Provider, and connect it to the Posts Data

3. Pagination
Use the pagination set to control how many posts are displayed at the same time.

(1) Select the Dinamic List in the Tree.
(2) Click the Filter icon next to the data source and select Pagination.
(3) Use Items per page option to set the number of posts shown at the same time.
(4) Use Start From Item option to define the starting position in the list (Collection).
4. Layout
From here, you can start adding Building Blocks as children of the List Item to build your graphics. Position them anywhere on the canvas as needed.
You can add, remove, or reorder elements freely. We'll cover the basics, but you decide what to display and how.
Text
Text
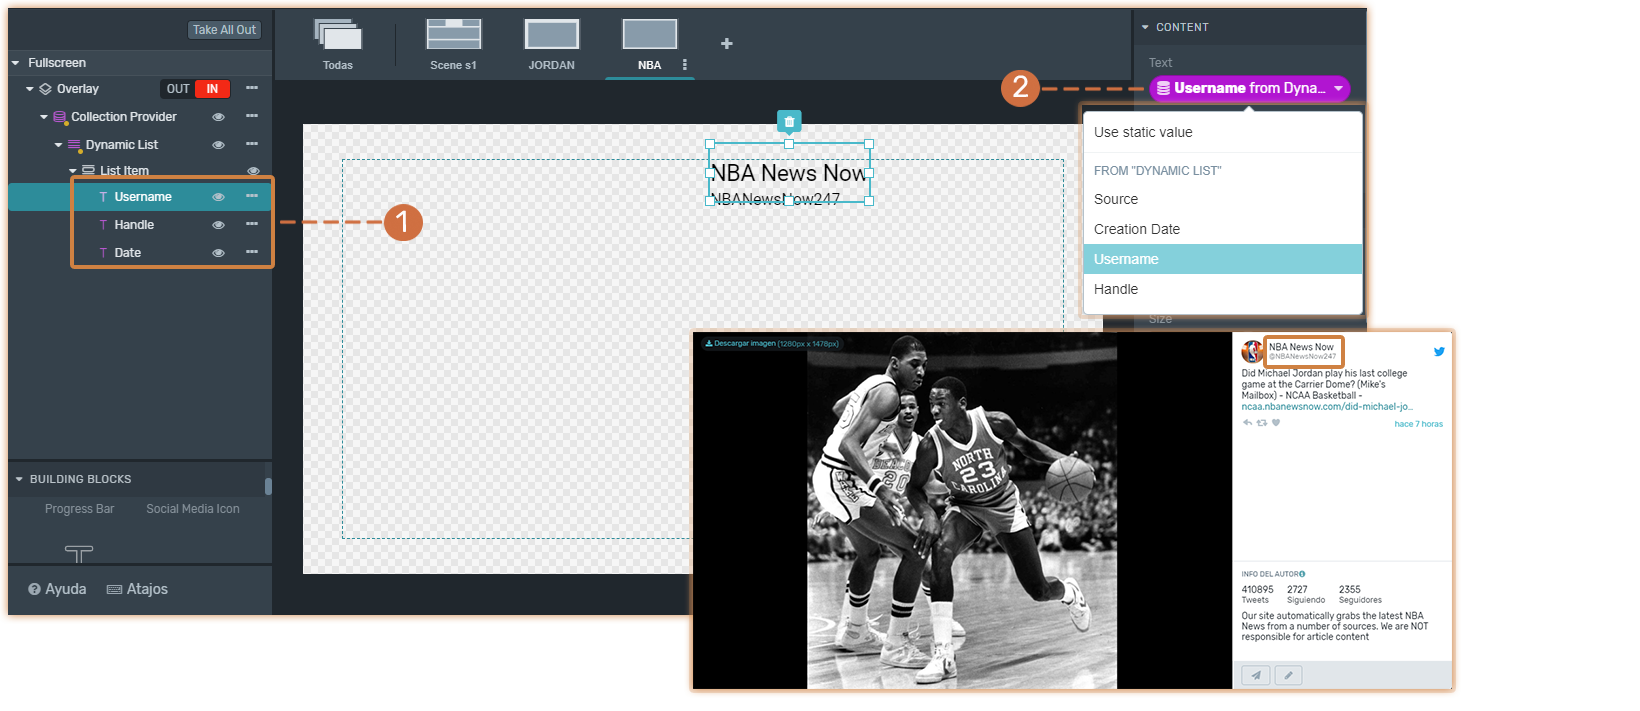
(1) Add a Text Element to your graphics. As a best practice, rename it by double-clicking to easily identify it while building.
(2)You can connect the text element to the following post data:
Username: displays the name of the user who posted the content.
Handle: shows the user’s social media handle.
Creation Date: shows the post creation date.
Source: displays the Social Media platform.
Note: Each data field requires a separate Text Element. For example, if you want to display both Username and Date, you must add two Text Elements and bind each to its corresponding data.
Image
Image
(1) Add an Image Element.
(2) Connect it to Avatar to show the profile picture of the user that posted that content.
(3) Set a fallback image to avoid showing a blank or black space if the post has no profile image.
Social Media Icon
Social Media Icon
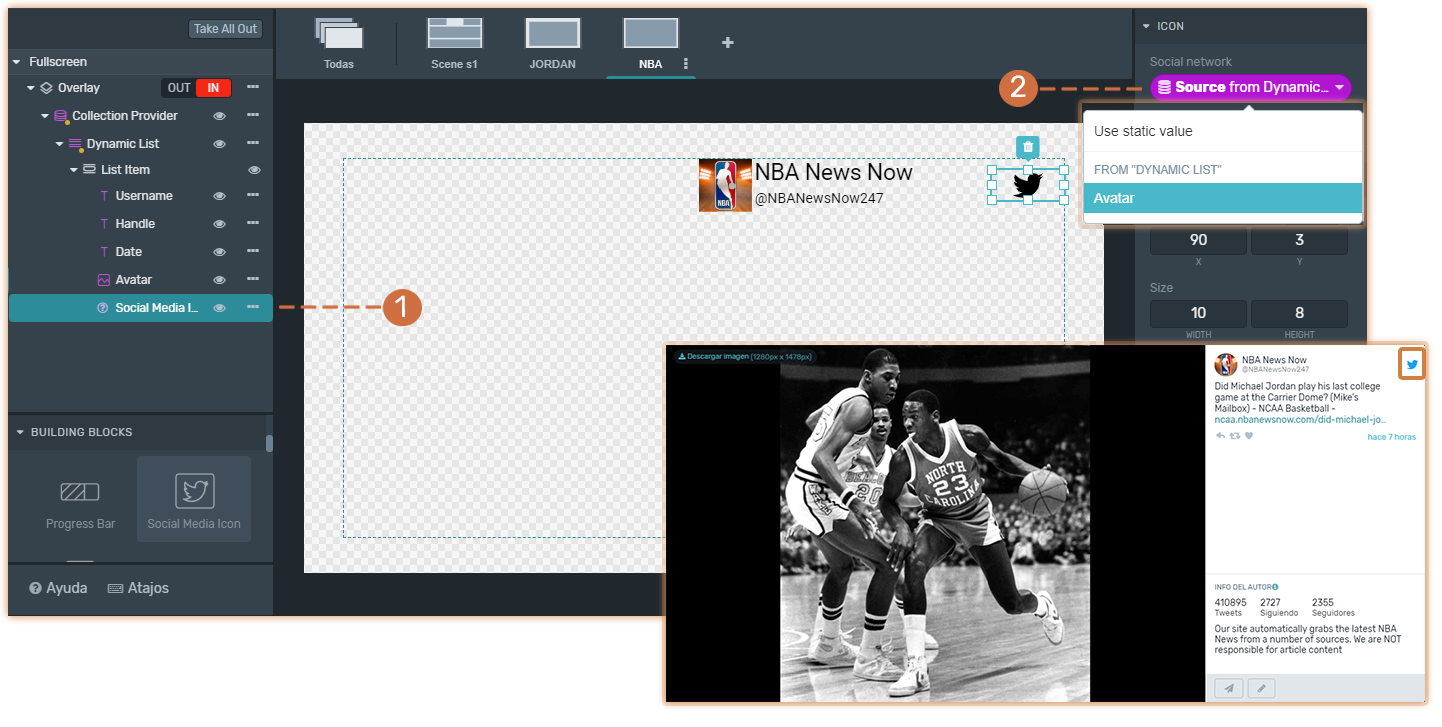
(1) Add a Social Media Icon.
(2) Connect it to Source to show the Icon of the social network from where the content was posted.
Post Content
Post Content
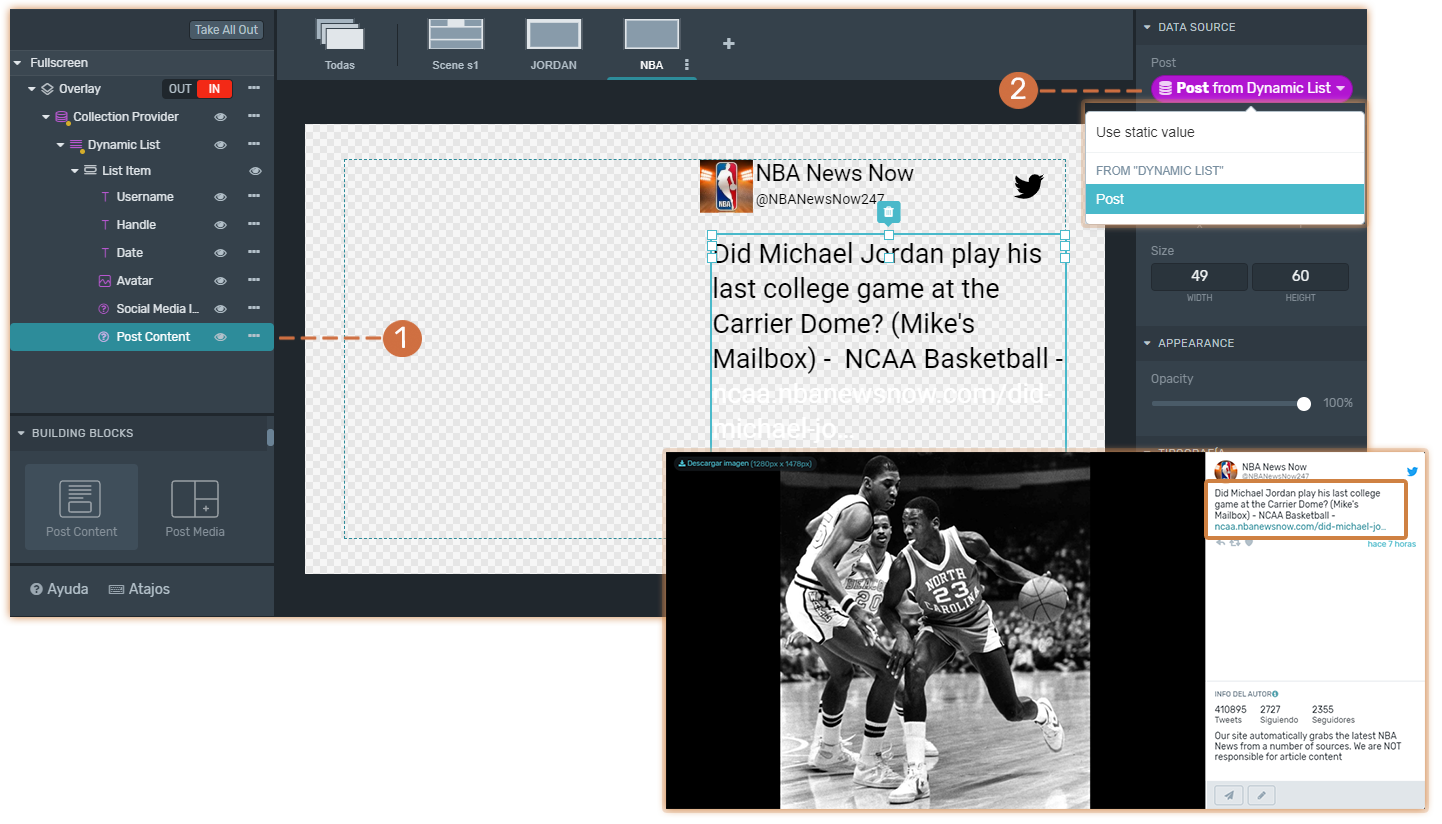
(1) Add a Post Content Element.
(2) Connect it to Post to show the text content of the posts.
Post Media
Post Media
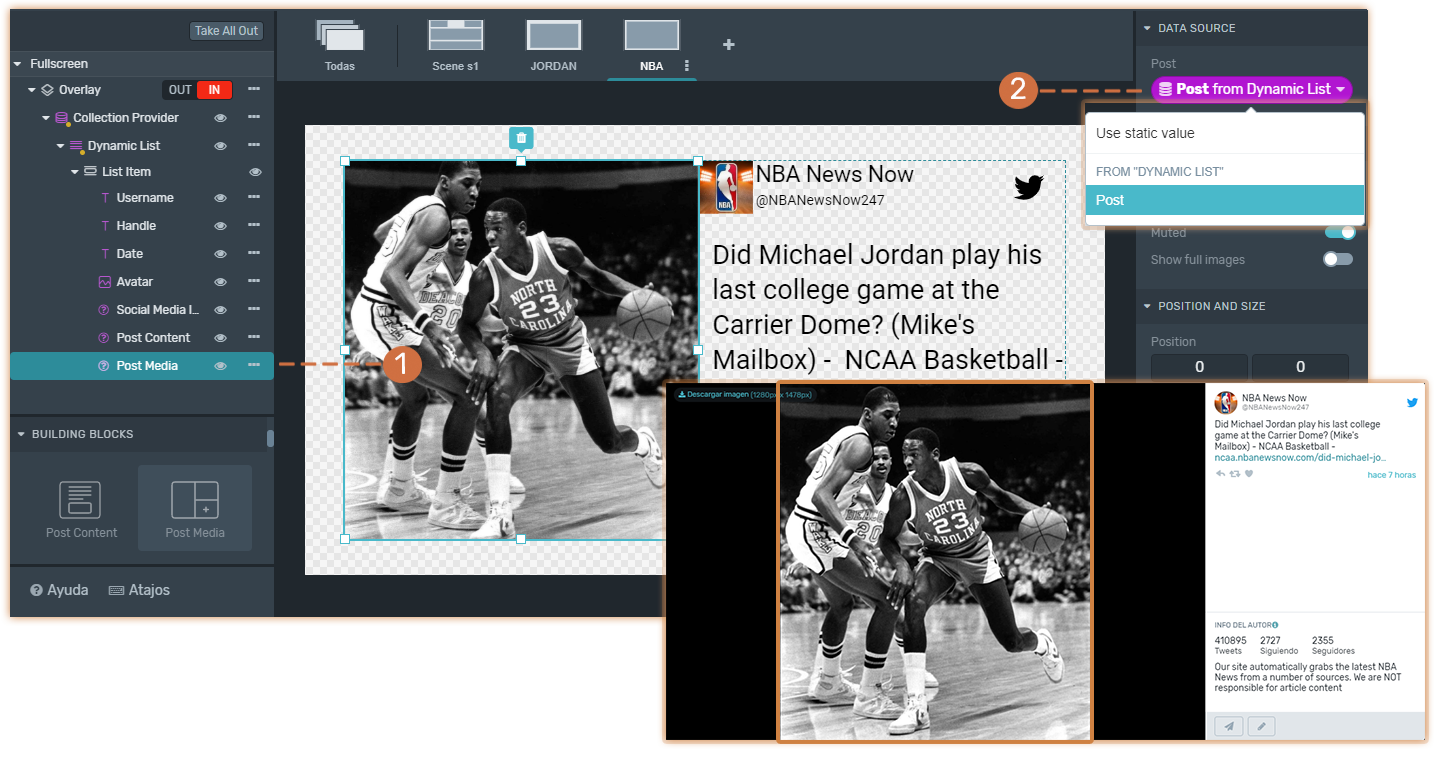
(1) Add a Post Media Element as a sibling of the Post Content.
(2) Connect it to Post to show the main media (image, GIFs, or video) of the post.
5. Additional Elements
Once you have created your graphics with its basic components, you can add some additional elements like:
Title
Title
Use a title to provide context or create a call to action for the posts being displayed.
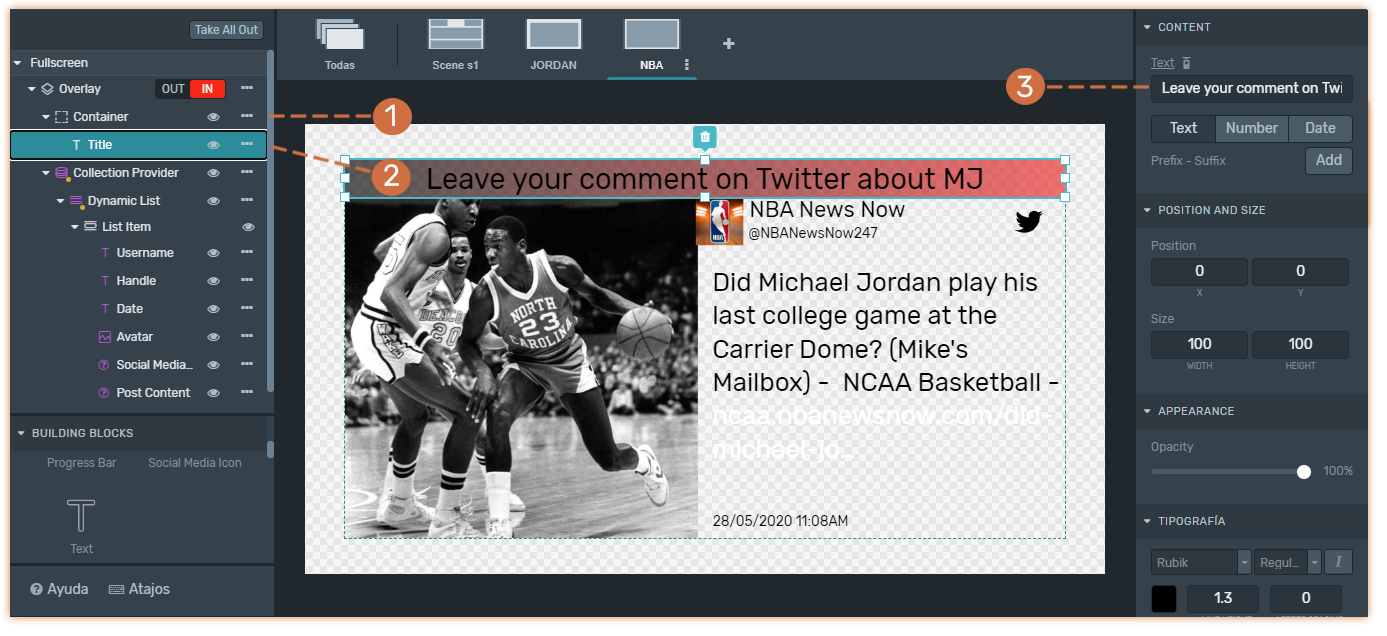
To add the title use the following elements:
(1) Add a Container Element as a child of the Overlay and sibling of the Collection Provider. We added a gradient as a background color of the container.
(2) Add a Text Element as a child of the Container.
(3) With the text element selected, set the text form the inspector.
Background
Background
If you are creating a full-screen graphic, you may want to add a background. However, for layouts like lower thirds or L-bars, which do not cover the entire screen, adding a background is not recommended.
Due to the stacking order applied in the elements that compose the Tree, this background should be added at the end of the tree and we recommend adding it using a container.
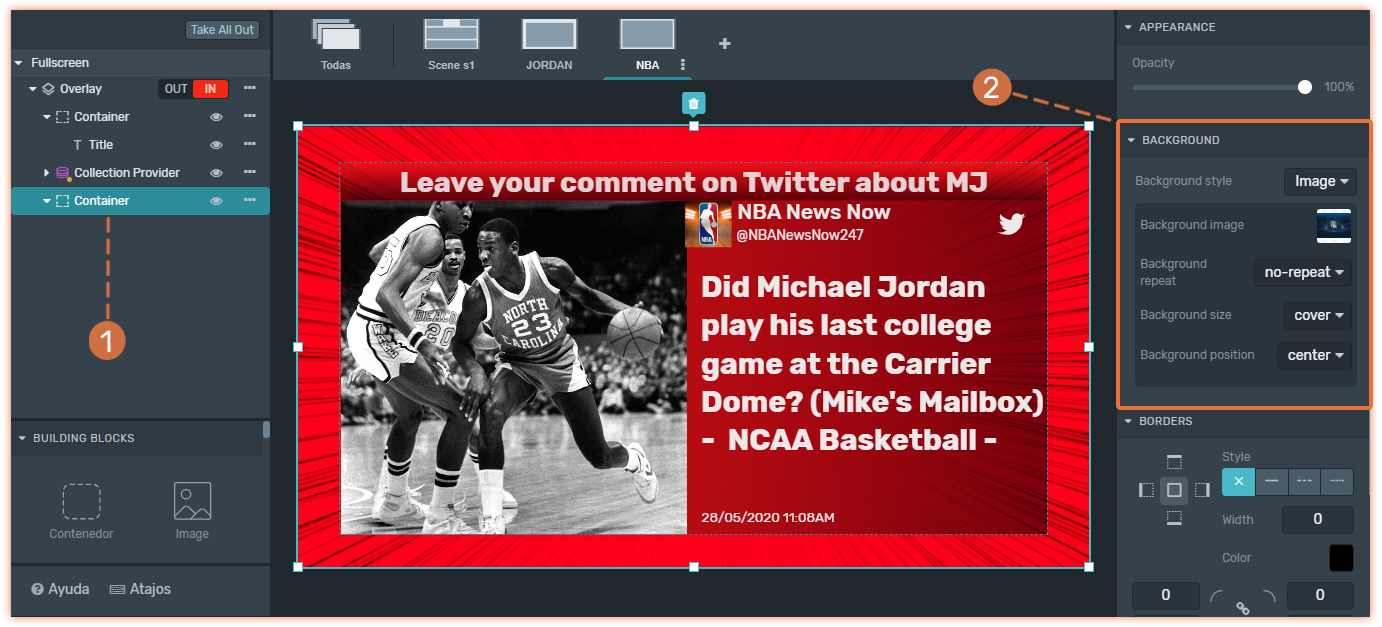
(1) Add a Container Element.
(2) Set the Background style in the inspector.
6. Remote Control / Live operation
With the Remote Control, you can manage and decide when to trigger the overlay that contains social content On-air using the IN and OUT button.
During live operation, use the gearwheel icon to:
Assign or change a Collection clicking "Pick a Collection" to feed social content into your graphics.
Change the cycling mode using the "Cycle" button.
Navigate posts, forward or backward, if using manual or semi-automatic cycling.
You can also use the Moderation tab to add new social content to your collections from the Flows or from the Discover Content feature.
All this is accessible from the remote and during the live operation.
