
Setting up a Scoring for a Page

Use it to render into your digital properties the Scoring Mechanic, allowing your audience to submit their participation.
Before setting up a web Scoring Widget you should:
1. Create a Mechanic of the Scoring type.
2. Setting up your Scoring Mechanic.
3. Create a Web Page.
4. Add the Poll Widget to your Page canvas.
Scoring Widget Properties

Elements Styles
Elements Styles
These properties allow you to change the style of the Mechanic's such as text, background and margins.
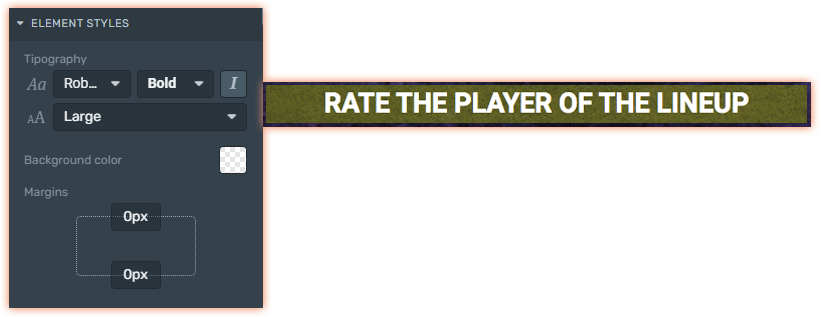
Typography: pick the font from the list, add one from the google font catalog, or add your own custom font. For more information click here.
Background color: Change the background color of the title.
Margins: Set the top and bottom margins. This property affects the element itself and not only the title.
Ratings
Ratings
Set the ratings style you want to create your own look and feel.
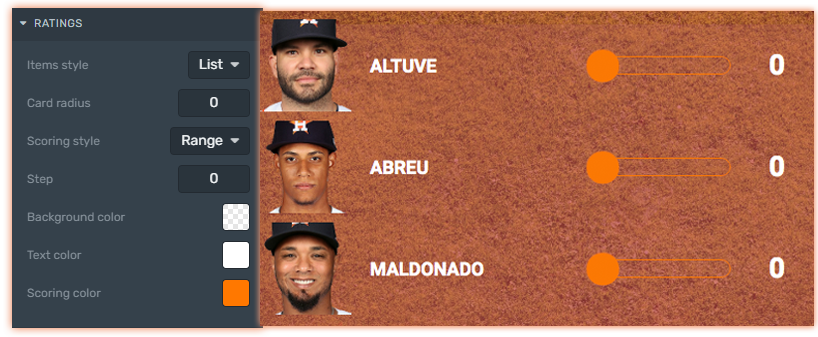
Items style: Pick the style from the drop-down:
List: Use this layout to get voters to choose among the options list.
Cards: Set up a score card for ratings.
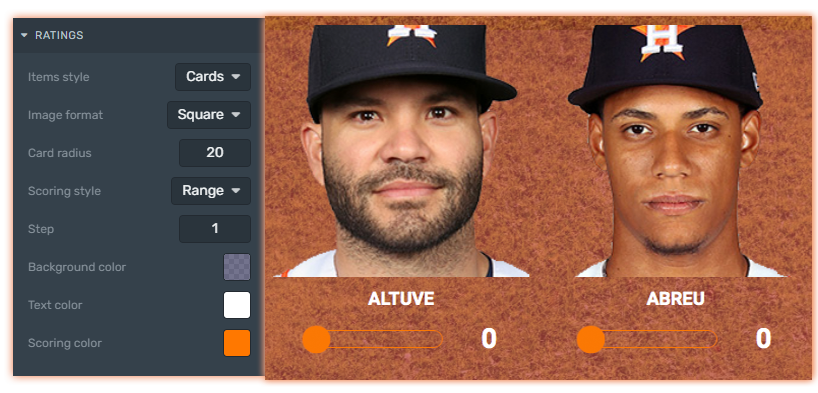
Card radius: It defines the radius of the corners of the option cards.
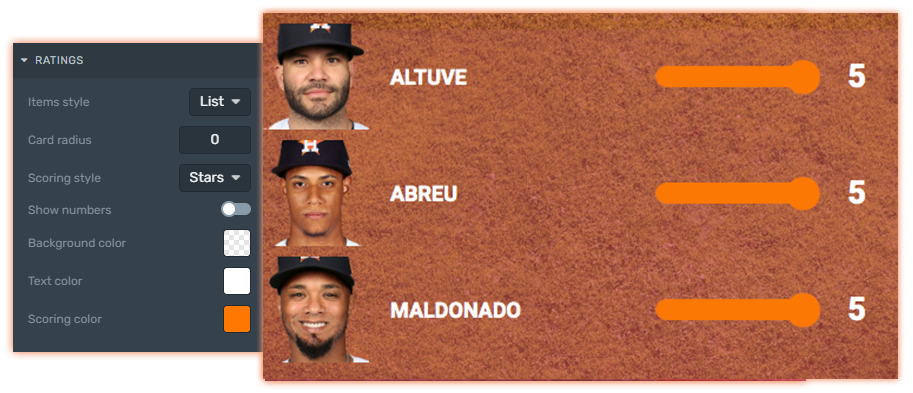
Scoring style: Helps define how you want the audience to submit their score.. It can be through:
Stars: Determine how many stars to give to an option, e.g. rate on a scale from 1 to 5 stars.
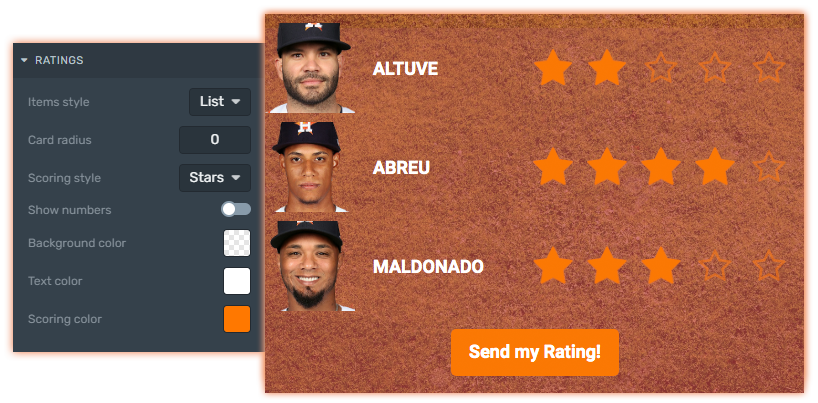
Range: Allows your audience set a scale points through a slider.
Background color: Customize the BG color of the card that contains each option.
Text color: Also you can customize the font color.
Scoring color: Pick a color to the range style.
Buttons
Buttons
Customize the style of the action button.
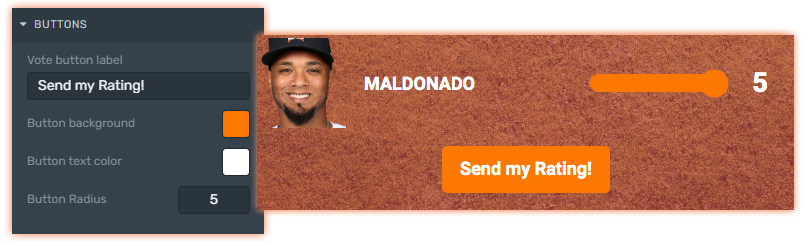
Vote button label: Customize the text of the action button.
Button background: Set the BG color of your action button.
Button text color: Use it to set the color of the text.
Button Radius: It defines the radius of the corners of the action button.
Thanks Message
Thanks Message
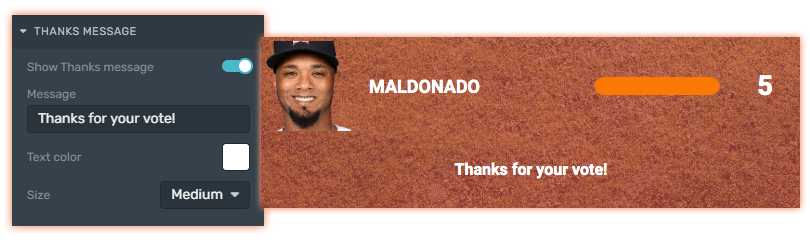
Show Thanks message: Enable it to display a thank you message after submitting a score.
Message: Set the thank you message.
Text color: Use it to set the text color of your thank you message.
Size: Specifies the size of the text.
Standby State
Standby State
Customize the style of the Standby State. This state is prior to the beginning of the voting. Configure it to let your audience know that the action is about to begin.
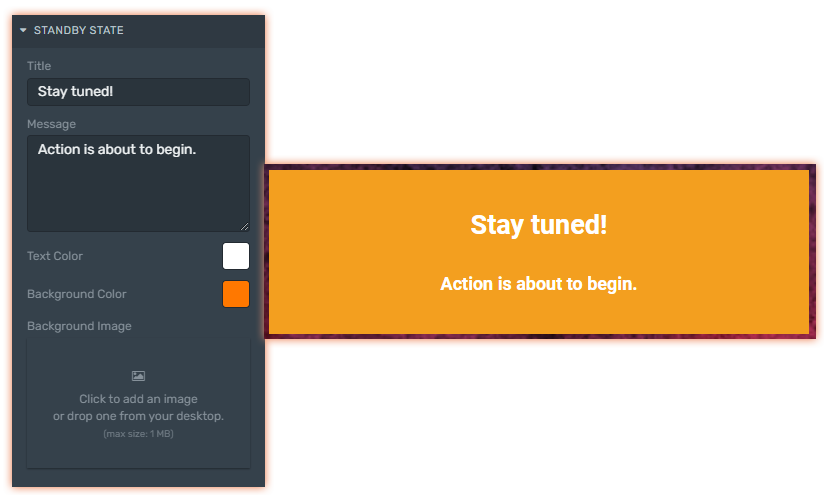
Title: Encourage your audience to stick around and participate in the Mechanic.
Message: Let your audience know when the action will begin.
Text Color: Use it to set the text color.
Background Color: Customize the BG color.
Background Image: Set an image as a background instead of a solid color.
Title
Title
Is where you will be able to define the closing message of the Mechanic.
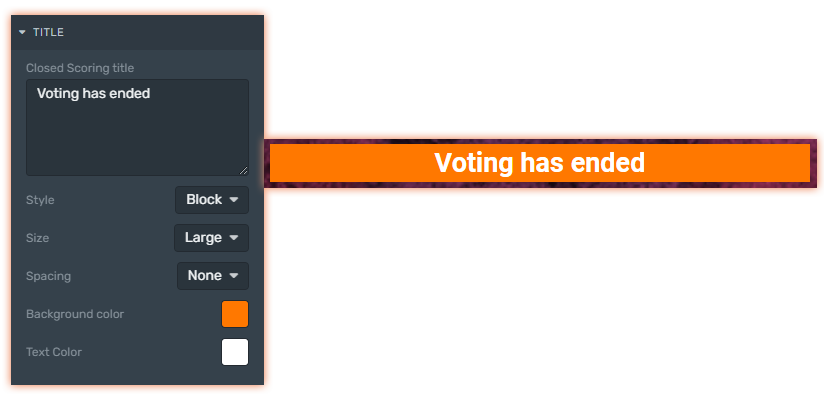
Closed Scoring title: Let your audience know that the mechanic is over and thanks them for participating.
Style: Set a simple text or add an image block for closing.
Size: Specifies the size of the text.
Spacing: Helps setting the height of the background message. It can be small, medium, large, or none as the example.
Background color: Pick the background color.
Text color: Use it to set the text color for closing message.